

How To Repair Fake White Marble
I was hesitant on trying this DIY as information technology receives mixed reviews. When I shared on social media that I was considering it, I got many strongly worded warnings that scared me off. I changed my mind, nevertheless, when a friend pushed me to effort it. "There'southward no downside," she urged me. I realized she was right!
I've always been curious to try one of these simulated marble DIY kits and here was my hazard! If information technology turned out badly I knew I could paint information technology patently white and practise an epoxy coat. Armed with my backup plan, I purchased my kit and prepare aside a two-day window of time to piece of work on this project.
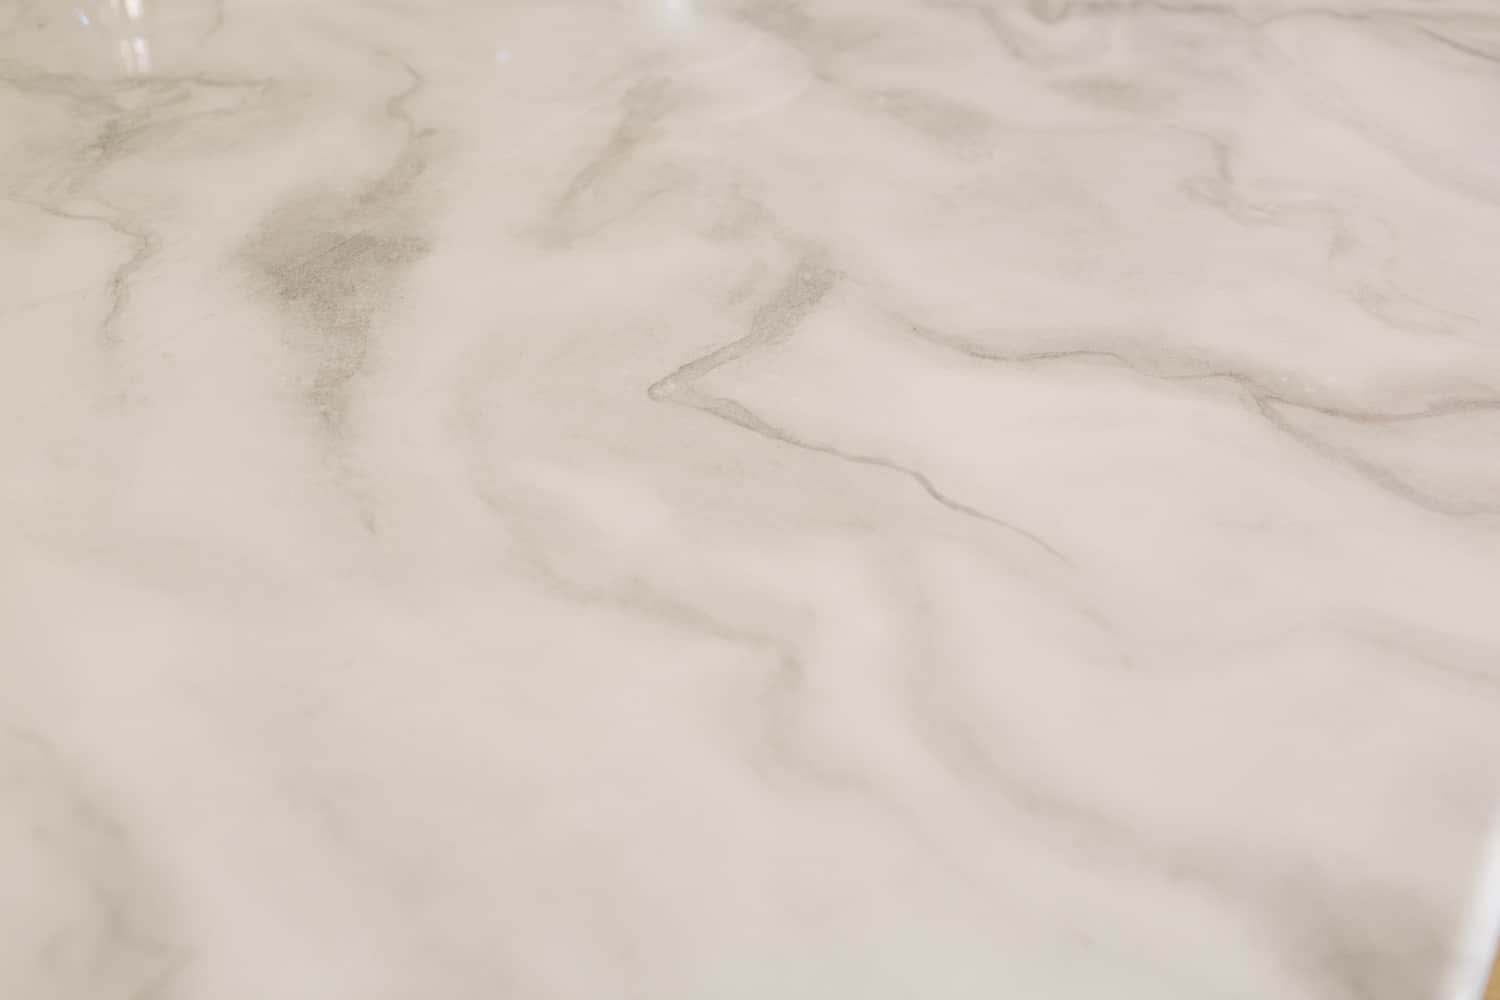
Let's talk virtually the before + after real quick! (These are unfiltered, unedited telephone pics hither!)
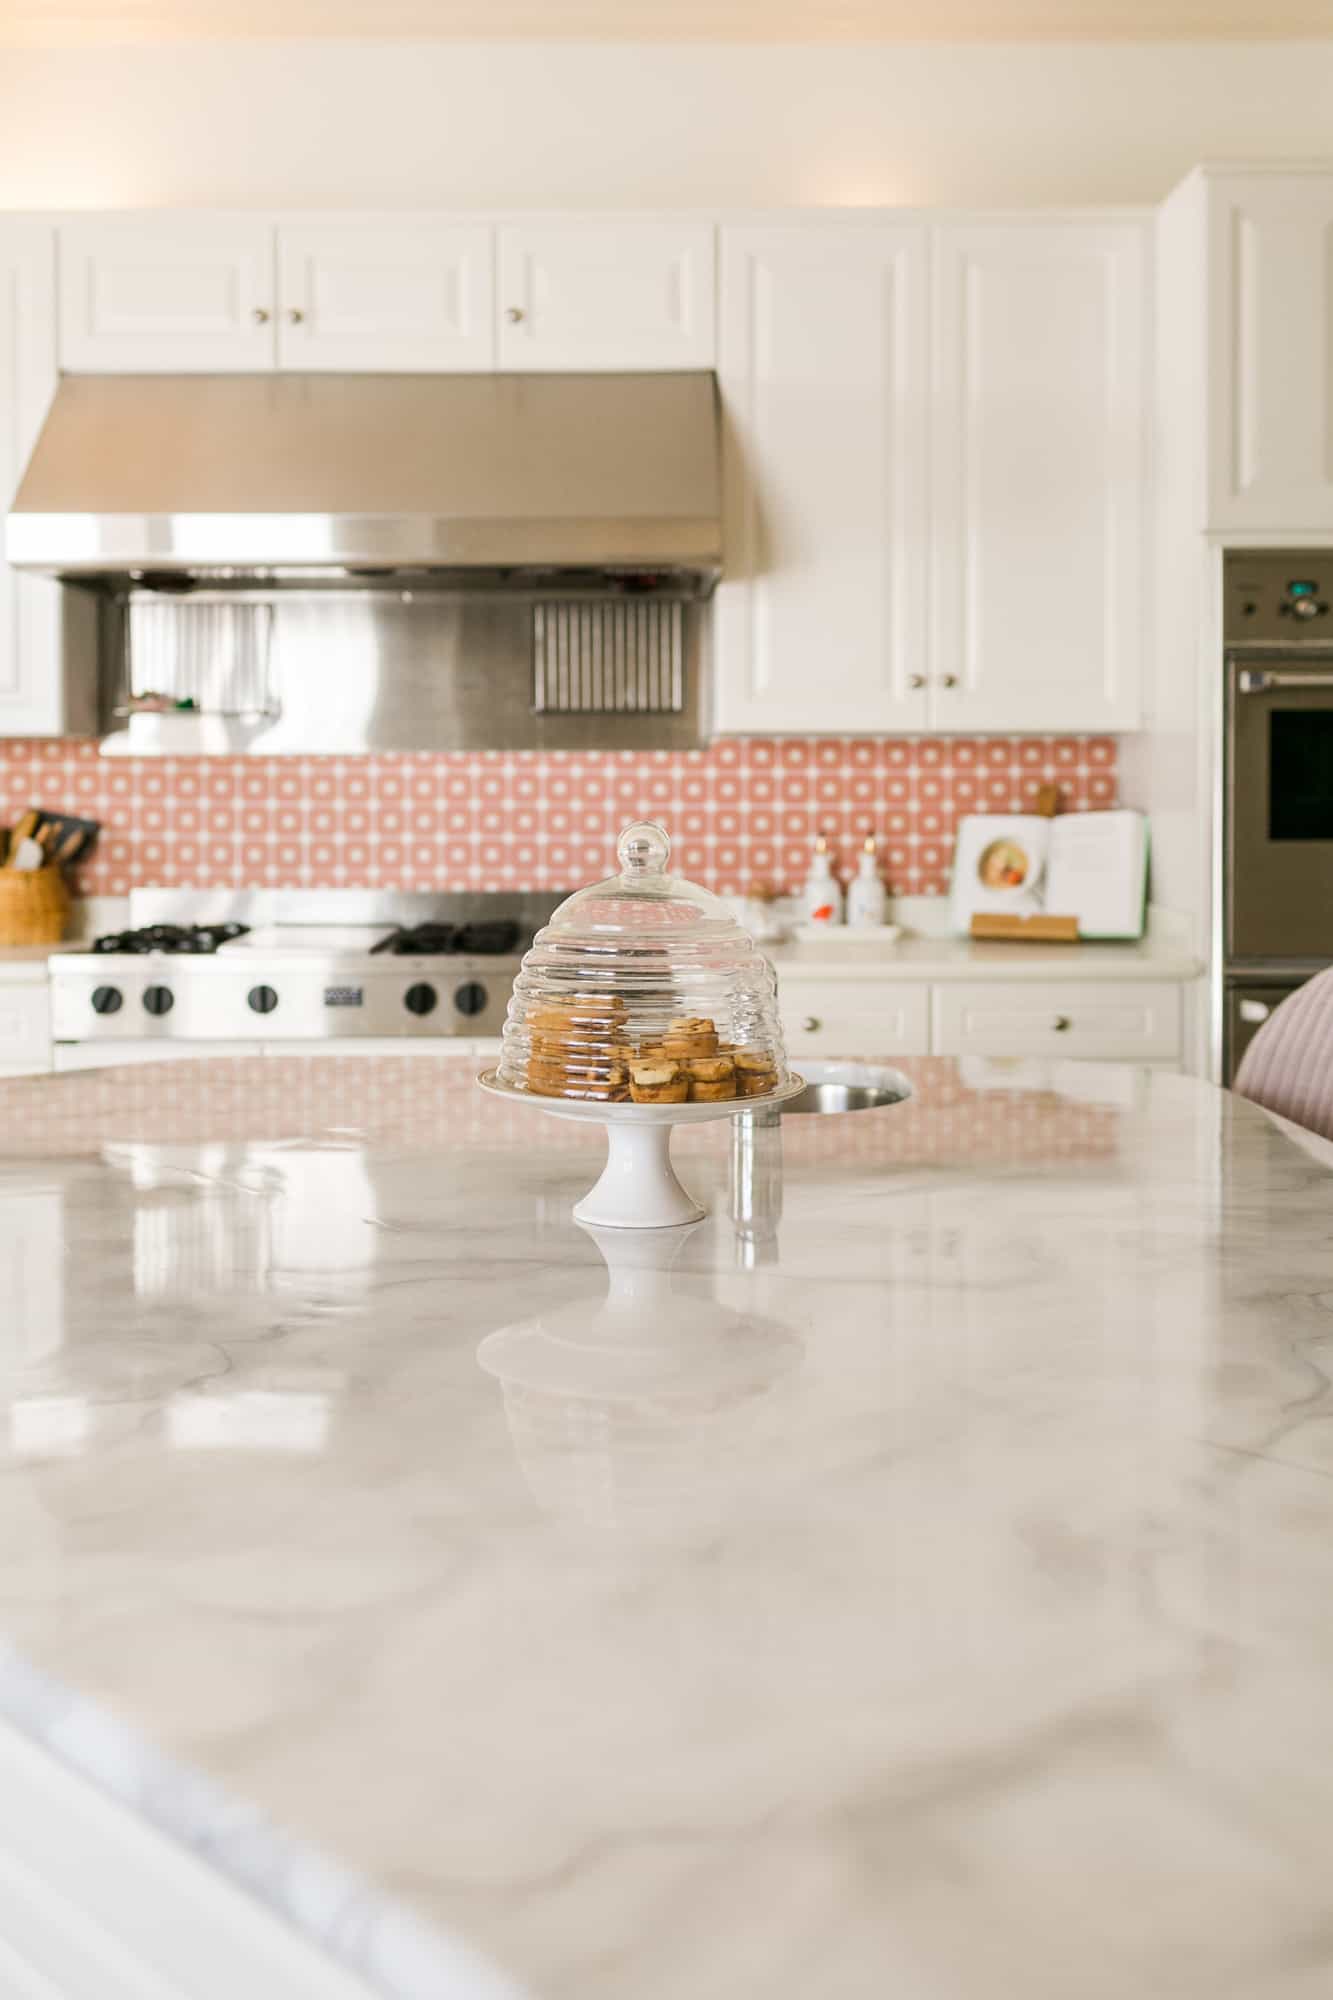
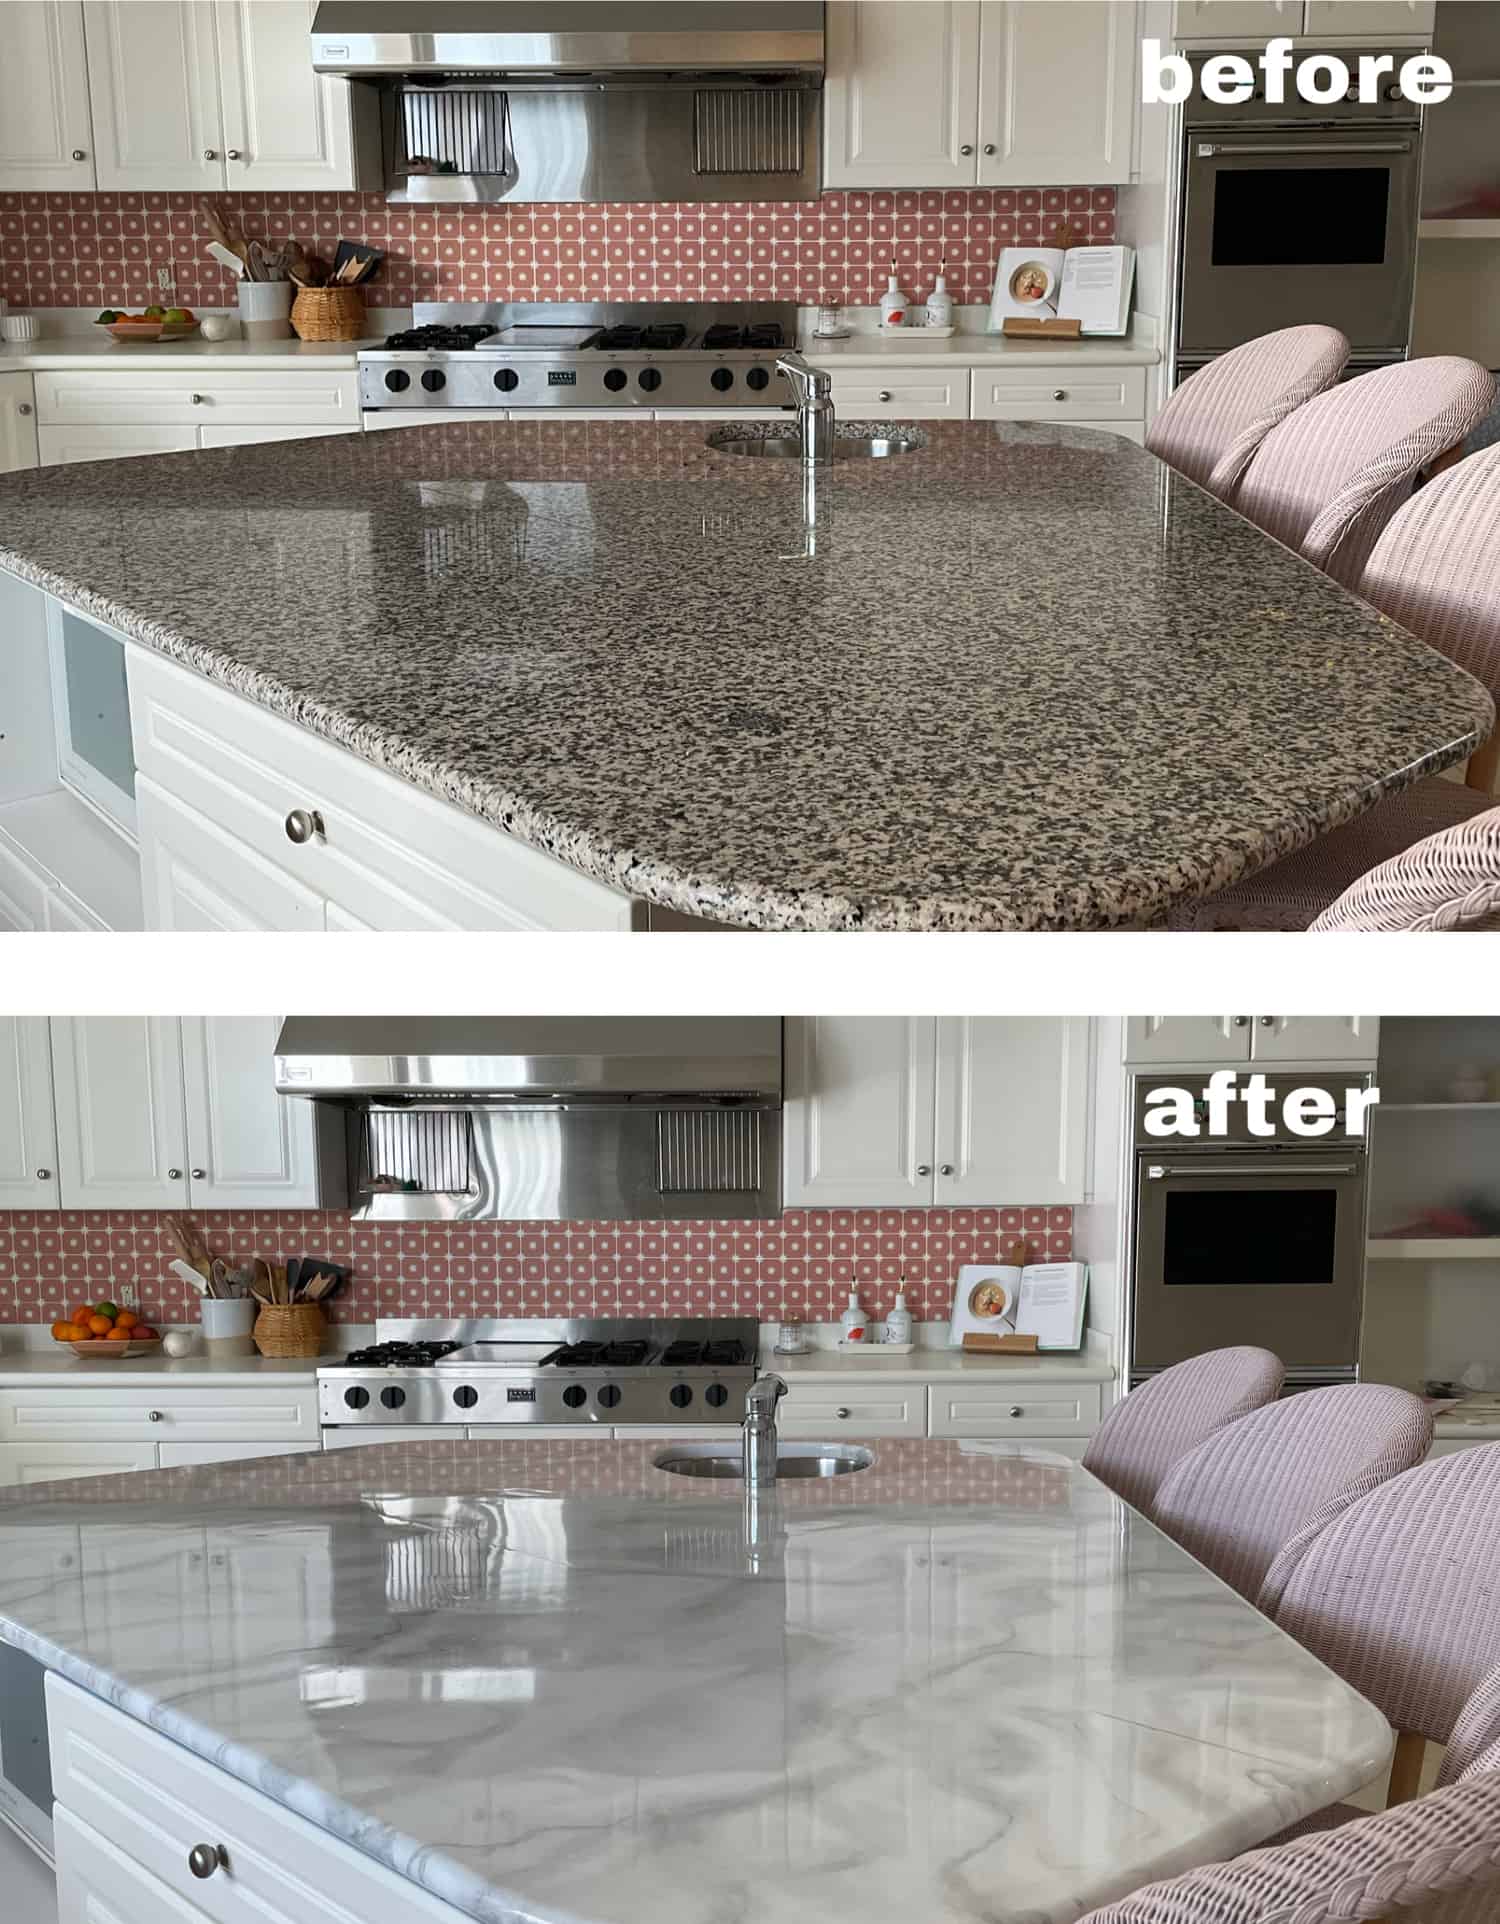 I Honey how mine came out! It was much easier than I expected it to be and information technology actually simply took two days. 100% worth it to me!
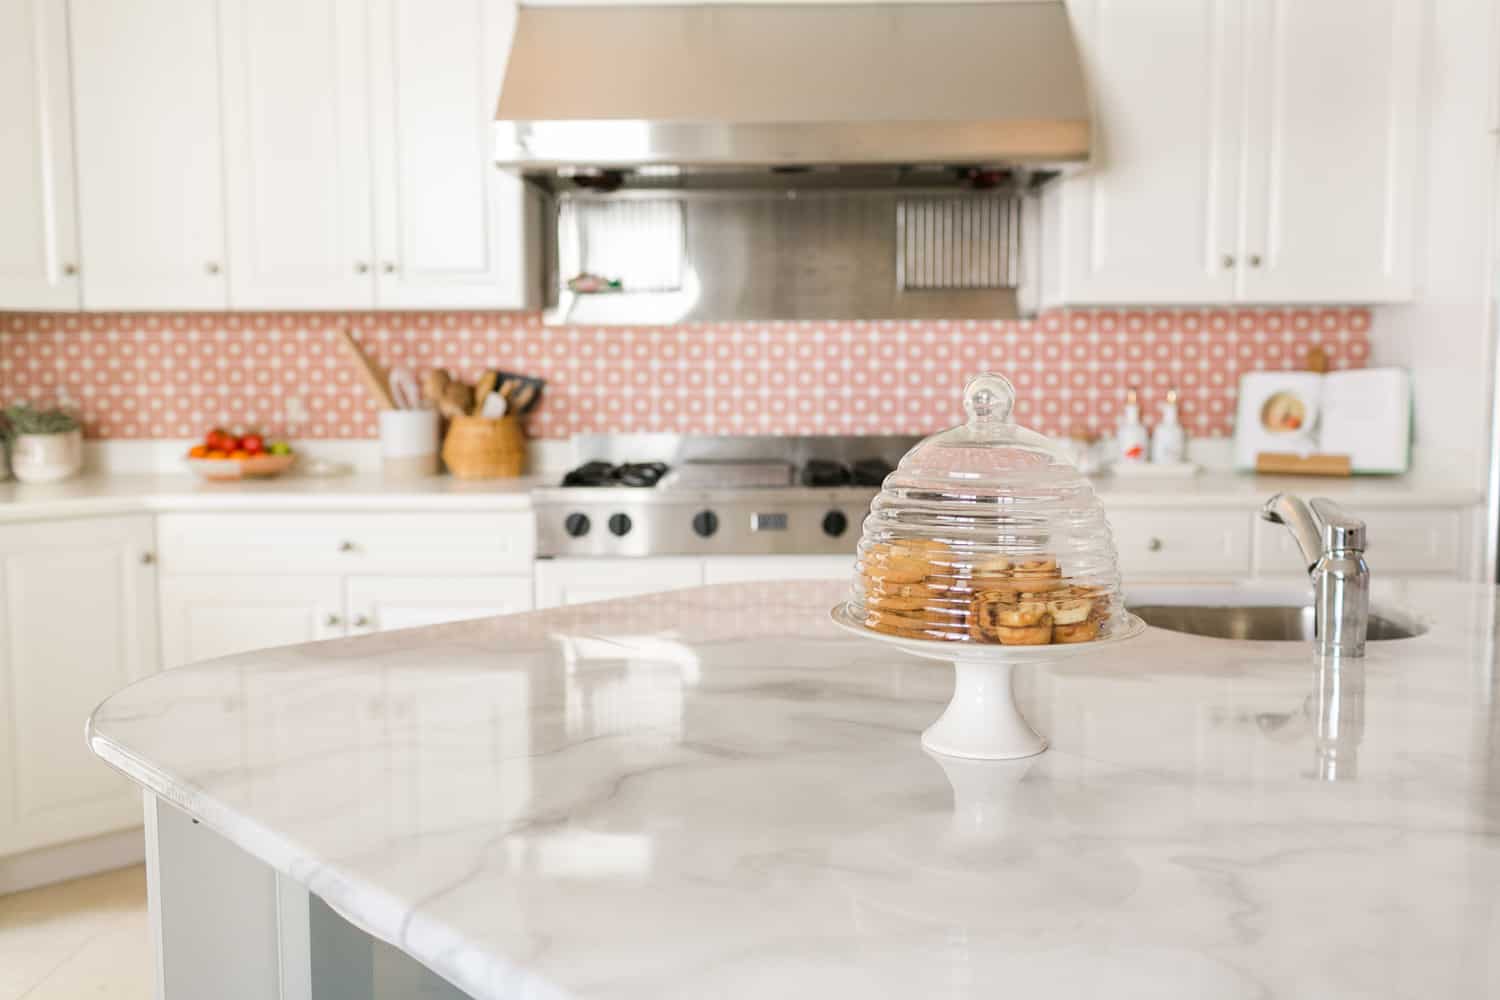
When we moved into this dwelling house, this isle counter was one of the master things that stood out to me equally "not my style." However, with a kitchen remodel a few years off, it did not make sense to pay for a new counter that we wouldn't even keep in the final blueprint. So I knew I was stuck with it for a while … OK, no big deal. After our start Christmas in the house, my mind began to wander back to DIY solutions. Was in that location Anything I could do that was inexpensive, but could also hold upwards to our family's traffic?
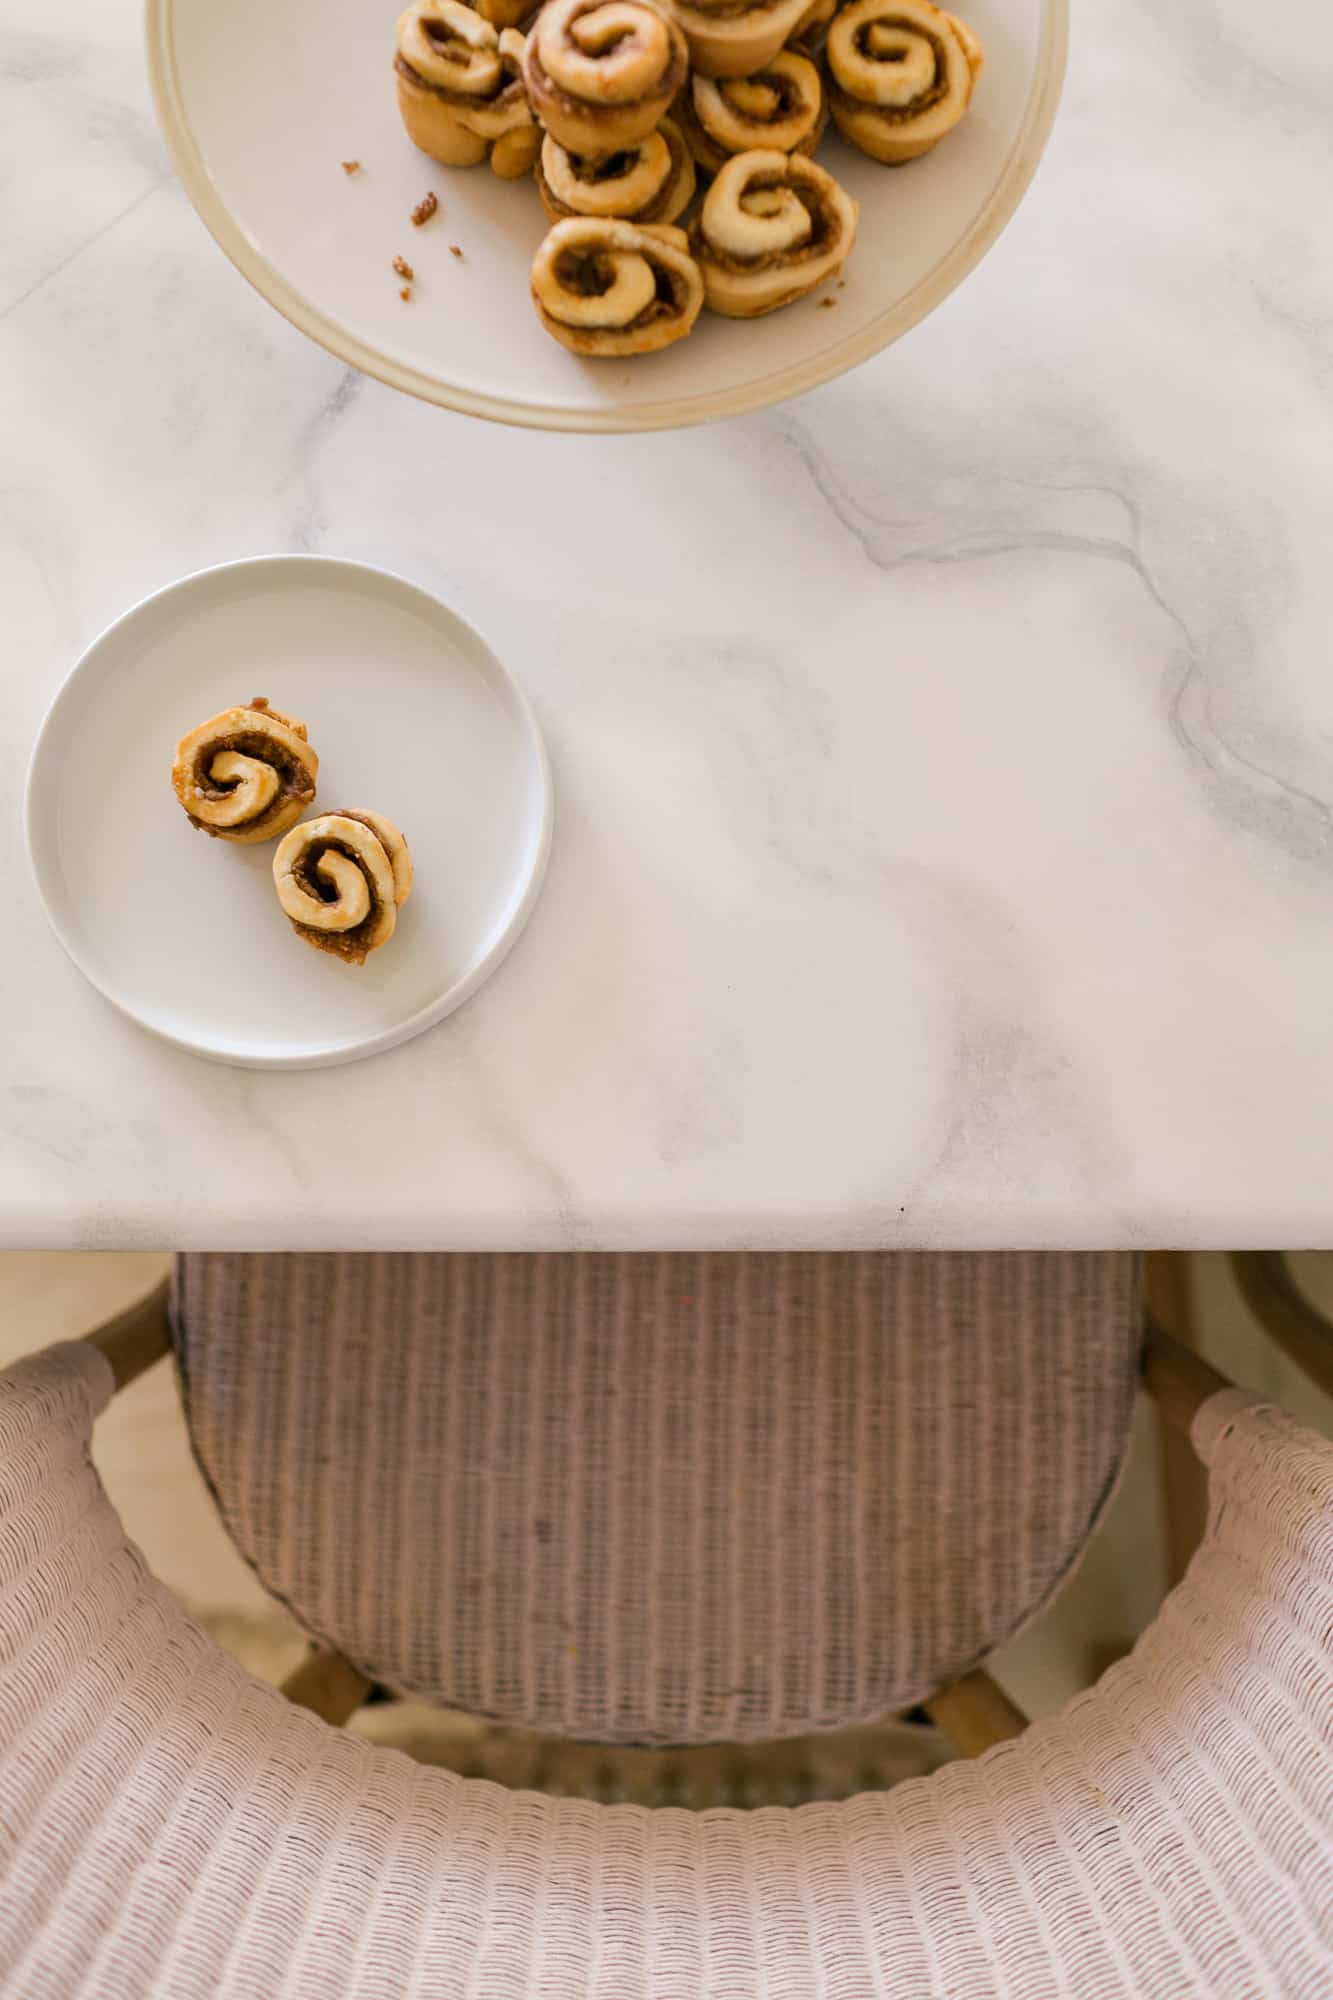
This is a high-traffic counter—our kids sit here to eat several times every day. Anyhow, I finally caved and bought this kit and it was the PERFECT solution I was looking for. I honey how information technology looks now—it makes me smile every time we walk into the room. Information technology'south like shooting fish in a barrel to clean as well. I am so happy I tried it!
In this mail service, I will share everything you demand to practise your own counter, tips for painting the marble and the pros and cons list for this project. I hope to exist brutally honest considering even though I honey my results, I know this is not necessarily a expert selection for all homes.
The only thing I tin't cover in this mail is how the counter volition wear over time (I just completed ours inside a calendar week of writing this). I will add an update hither in a year or and so when I have more than information on that. I volition say upfront that there are reviews saying these counters are piece of cake to scratch and don't article of clothing well. Then if that's a major concern to yous, have that into account. Since nosotros plan to remodel our kitchen in the next two years (could be longer), I am comfy with that adventure. If I have to do a repair in that timeframe, I would be OK with that because the joy of having counters that fit my aesthetic is significant to me.
 DIY tips:
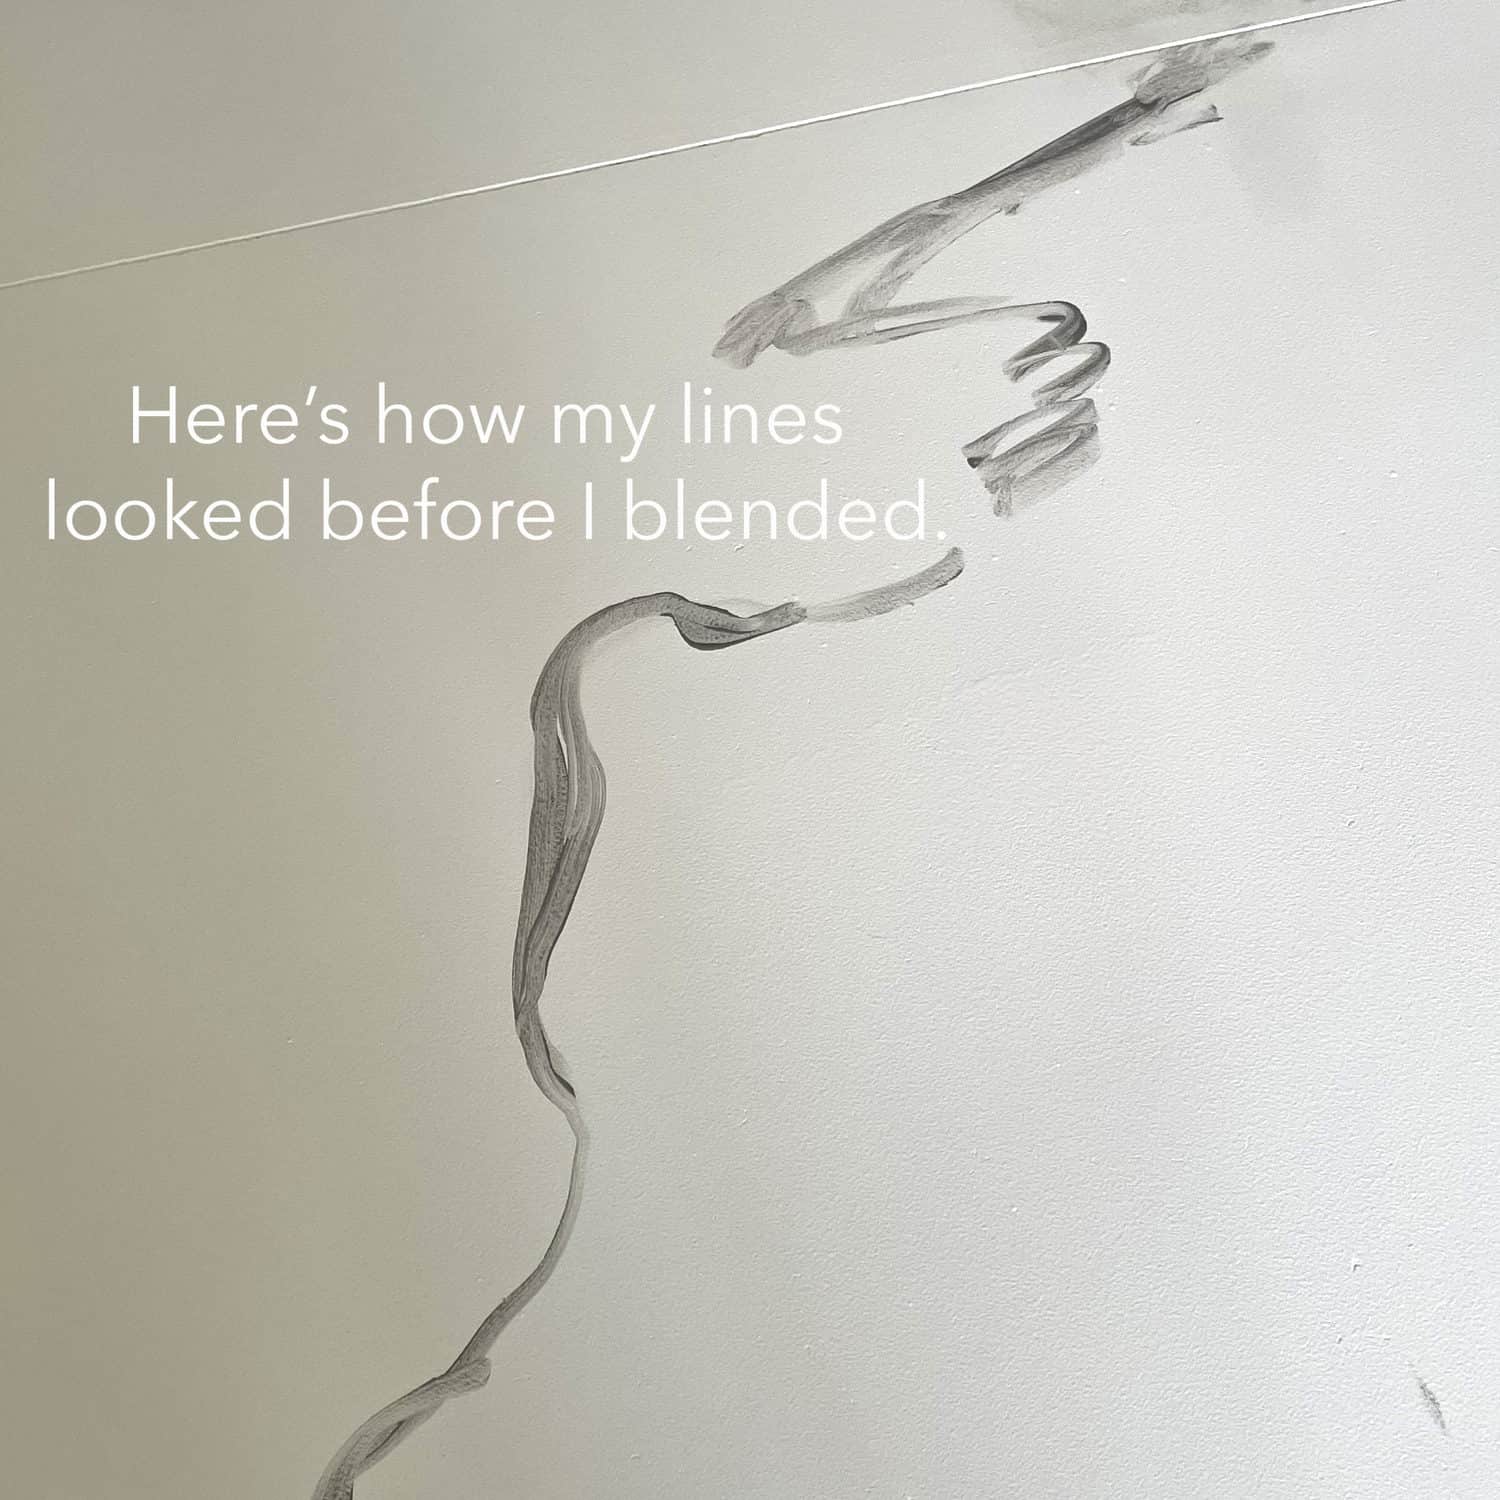
A lot of people have asked me if y'all need to exist artistic or a good painter to do this. I don't call back so. I would say that y'all need to be patient and detail oriented, just it'southward better if you lot aren't a perfectionist. Since I am not a perfectionist (and I'm honestly not that good of a painter either), I had so much fun just getting messy and trying to emulate the wait of real marble from photos I had saved.
I was surprised how FUN this was. In all my DIY years, this was probably my favorite DIY I've EVER done. I had and then much fun doing it and I was surprised by how like shooting fish in a barrel it was.
I spent nigh three hours doing all the marbling for my counters. By the terminate, I was starting to think they looked really bad. Then I stepped away for an hour and when I came back I was happy with them again! So if you lot start to feel frustrated, I suggest taking a quick interruption.
Earlier starting my counter, I watched this 18-minute YouTube video. It's made past the makers of the kit and it's very detailed on all the steps. Watching the full video is essential earlier y'all begin. It will probably clear up whatsoever questions you have. We followed their instructions. In addition to the kit, the only supplies we needed were a pair of tweezers and some painter'due south tape.
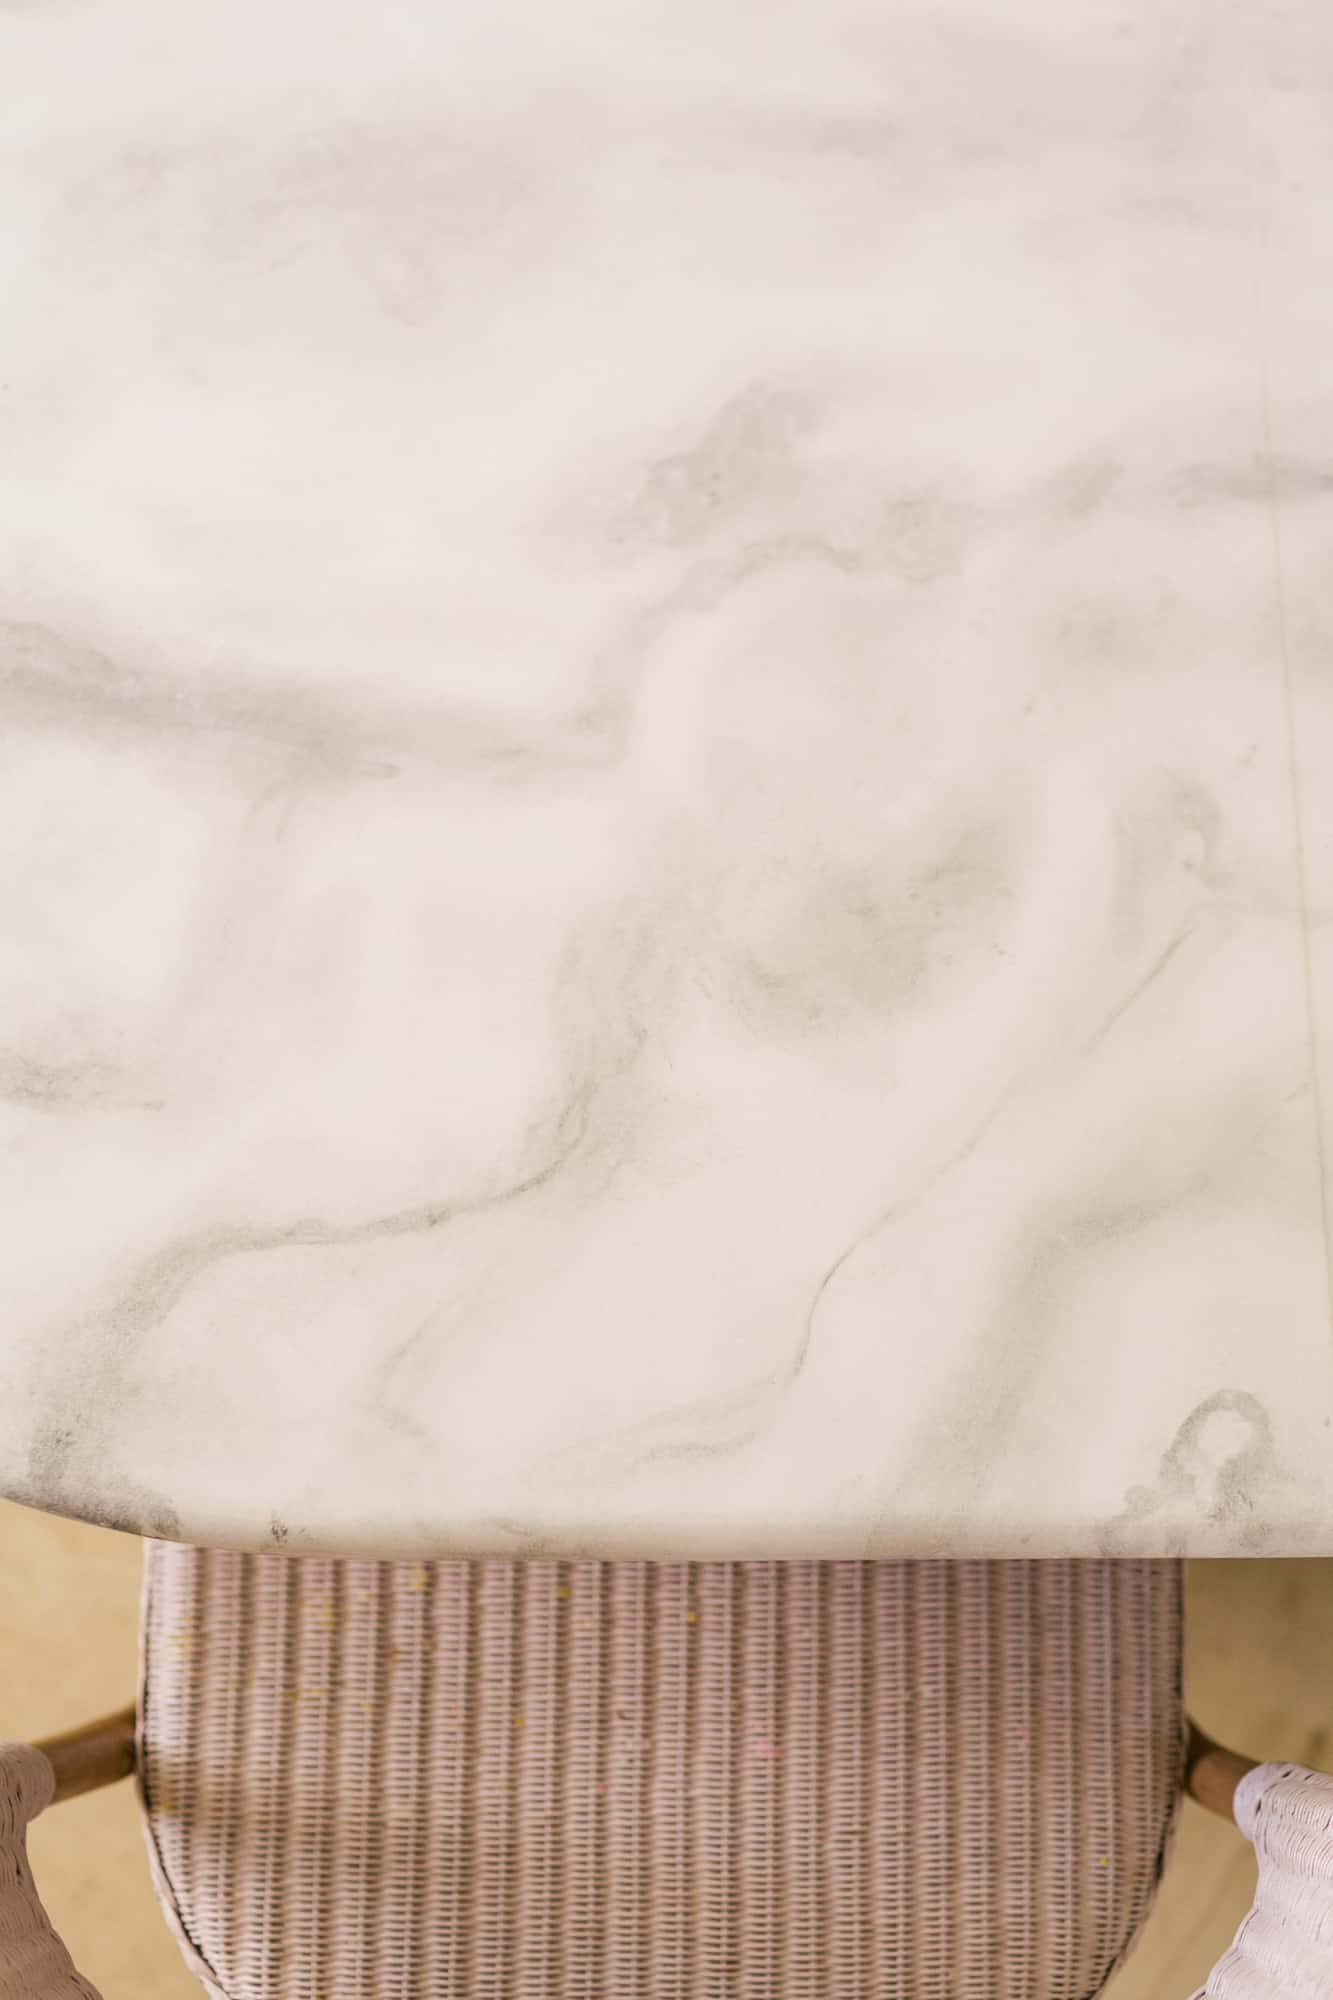
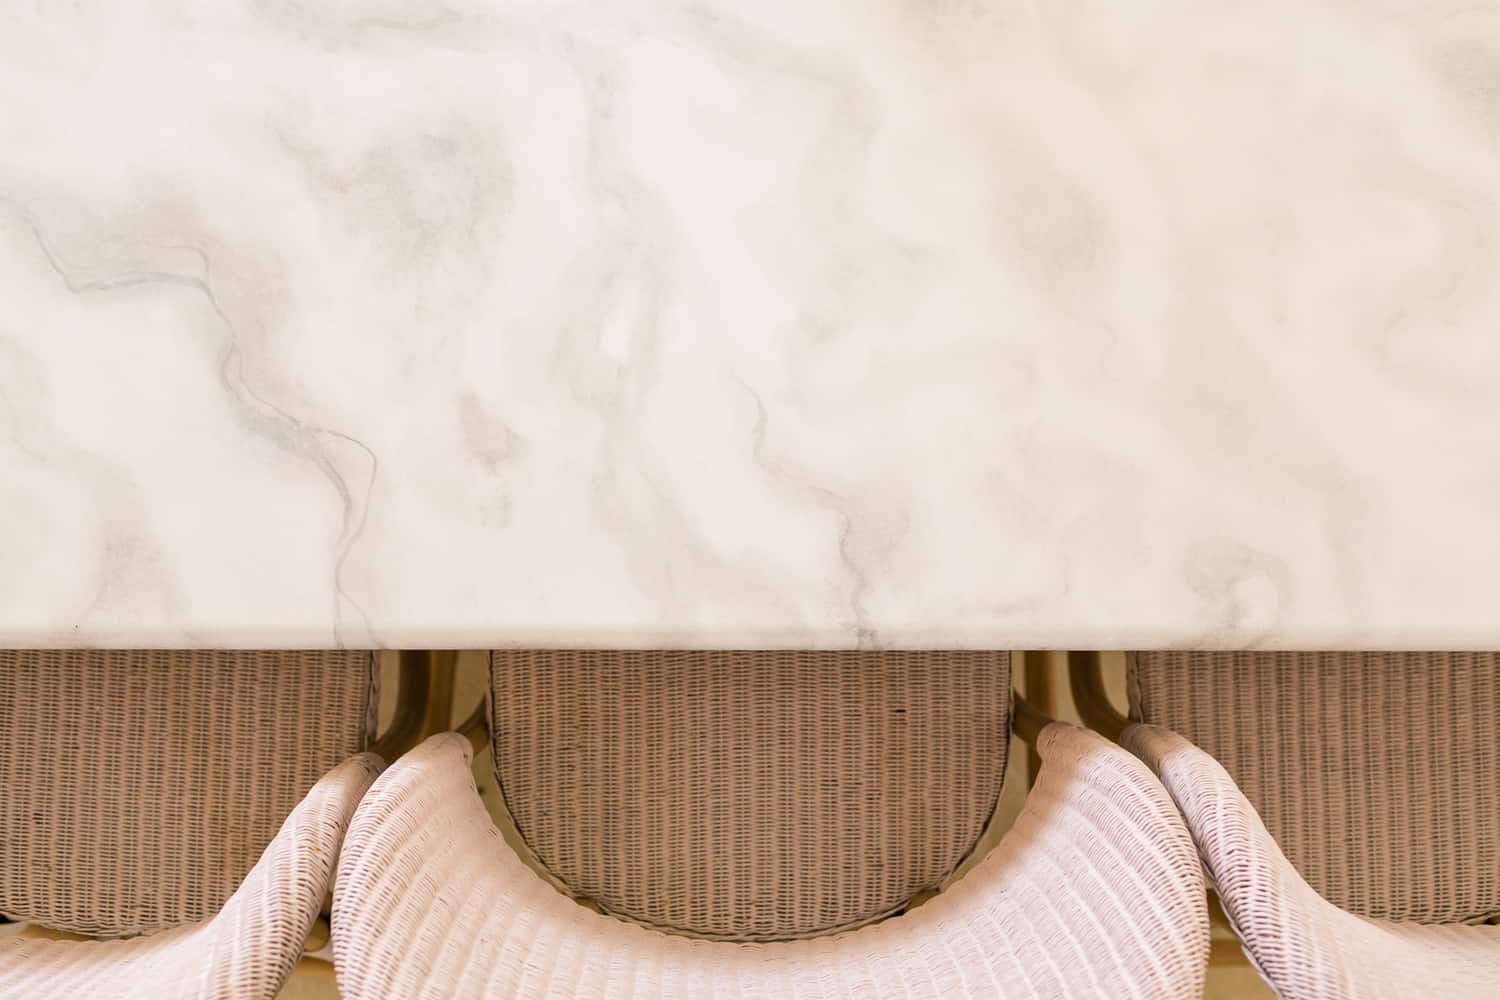
The well-nigh of import tips I have for making the marble expect real is to relieve some photos of real marble y'all love and effort to copy the look equally you paint. That was helpful for me to try to get a proficient level of imperfection. If I wouldn't accept kept looking at the photos of real marble, it would take looked more fake.
 One thing I did differently from the video is that I found information technology easier to practice the edges as I went along. I think keeping your edges coherent so each vein looks seamless is very important. If you accept a backsplash ledge, I would follow this advice at that place as well.
If you are nervous, go for lower contrast. It's easier to go a lower contrast marble to look existent than a high contrast.
Don't be afraid to mess upwardly—it'southward so piece of cake to wipe a section off and start over anytime you need to.
If you go besides night yous can lighten them later by blending in a little more white paint.
One final tip! Yous don't take to buy the kit to exercise and encounter if you enjoy (or can do) the faux painting. Just try it out on a piece of white foam board with some paint and castor (watch the video higher up and try to practise the technique). I didn't think to try this in advance, just the fright that I wouldn't exist skillful at the faux painting was a HUGE obstacle for me. Then there's a depression risk way to endeavour it out!
 Answering your questions:
Q: Can you place hot pans on the surface without a pad?
A: No.
This was one of the most asked questions! I never put hot pots on whatever of my counters without at to the lowest degree a potholder, so I was surprised. If that is something you like to do, I would not recommend these counters for you.
Q: Is information technology easy to clean?
A: Aye. It'due south a shiny, sleeky terminate and easy to wipe and make clean.
Q: Can yous start with whatever kind of counter? Does it need to be granite?
A: It does not need to exist granite. In my opinion, it's more ideal to do it on a laminate surface because then it'south a 100% upgrade. At that place's a valid debate to whether doing it over granite is making it less valuable (I would say that it does cheapen it some), but in the example of our house since we did not like the granite and were planning to replace it anyway that wasn't a factor for me. Simply aye, according to the Giani website, you can utilise this on pretty much any blazon counter—vinyl, wood and different types of real and simulated stone.
Q: Would it work on a piece of plywood if I want to brand my ain?
A: I would advise a smooth wood. Merely yep, you can use it on wood!
Q: Did the epoxy odor really potent?
A: No.
I was pleasantly surprised. The primer coat of paint is probably the strongest odor and it'southward on par with regular wall paint. We had a screened window open up the whole two days and in that location was no noticeable aroma at all, which was AWESOME. The epoxy didn't smell.
Q: Would you lot do this on counter you are keeping long term?
A: This is tricky!
If you lot are roofing over a laminate counter in poor condition, I would say yes! If you are roofing over granite like I did, I would pause and really consider whether it'due south worth it to you lot. The surface volition no longer be heat resistant (similar granite is).
I will update this post in a yr and tell yous how it wore for u.s.a.. Information technology seems like if you lot have a very high traffic area you might need to expect to exercise affect ups, or fifty-fifty completely redo information technology after a number of years. And then think almost whether yous're willing to exercise that.
In a low traffic infinite, I retrieve YES, for sure. But no kitchen is really depression traffic.
Q: Did you make whatsoever mistakes? If so, how did y'all set?
A: Yes. As I was painting, my brush was shedding little hairs and when I picked them off it made scratches (use tweezers instead!). Until the epoxy is on, the painted surface is very delicate. To set it, I just dotted more paint on it earlier it was sealed.
The other mistake we made was that there were a few small holes in the epoxy finish around the seams. And so on another day nosotros poured a TINY amount more on, just enough to fill in those holes.
We had a lot of supplies leftover (about one-half the paint and epoxy). And then nosotros're saving those in case we need to make repairs subsequently.
Q: How does the surface feel?
A: Sleeky and slick. Imagine a counter or tabular array and a bar or restaurant, a lot of times those tables accept an epoxy end. It'due south similar to that, although non as thick.
Q: Did you actually exercise this by yourself? Can it be a 1 person job?
A: Collin and I tag teamed—he did the base glaze and the epoxy, I did the false marbling. All the steps were easy and either of the states could take easily done the whole project alone!
Q: Did it turn yellow? (Will it turn yellow?)
A: The main reason I wanted to utilize a kit rather than source all the supplies from someone's DIY listing was to avoid the gamble of yellowing. Ours has no yellow color at all. I will update if anything develops over time (it better not!).
Q: Is it food safe?
A: No. You are recommended to use a cutting lath, plates, etc. It'southward also not prophylactic to cut on this without a cutting board (you might scratch it up).
Q: Do y'all have to remove the sink or can you go around it?
A: No, you just tape everything off and get around it.
Q: Did the epoxy drip everywhere?
A: Information technology dripped a niggling fleck (information technology was all caught in the provided tarps), merely very fiddling because nosotros followed the video's guidelines. You pigment the edges with a brush, and then yous are only pouring it into the center of the counter.
Q: Did Emma change her mind? (Emma was convinced information technology would turn out bad, we talked about it on the podcast)
A: She did! When I texted her my videos, she texted back "I was incorrect." THE ULTIMATE SATISFACTION … just kidding, I think she already believed in me deep down!
Q: Does it look better in photos or real life?
A: There are then many things that look better in photos, but this isn't one. Information technology looks the same in person! 🙂
 Pros + Cons:
Pros:
-It'south affordable. For under $200, you can consummate this counter project.
-It takes 2-iii days and makes a huge divergence in a room.
-It was so much fun! One of my favorite DIYs I take always done!
-Information technology'southward like shooting fish in a barrel. On the spectrum of counter DIYS (for example, this one), I would say this is *very piece of cake.* I've been DIY blogging more x years and this is one of the easiest high-touch on projects I've ever done.
Cons:
-We don't know for sure how durable information technology is notwithstanding.
-Faux painting is scary for many people.
-If you paint over granite, some people on the internet will transport you lot detest mail. (JK … maybe that last one was just me!)
-You cannot gear up hot pots on this surface. Use a trivet.
-Y'all cannot cutting vegetables on this surface and you lot should not serve food directly on information technology. Use a cutting board, plates, etc.
 Who I would recommend this DIY to:
-Anyone who desperately wants marble counters but finds them inaccessible for upkeep reasons.
-Anyone who has vinyl countertops in poor status.
-Anyone planning to remodel in a few years, looking for an easy phase-one makeover to love your infinite more in the meantime. For me, information technology was totally worth the $200 and ii days of piece of work. I will enjoy these counters And then much more than what we had before.
 I promise this post was helpful! I will check dorsum in in a year or so and add together some details on how they lasted and any budget tips I accept! If you've done with projection, I'd love to hear well-nigh your experiences! If we inspire you to effort your own, delight tag us on Instagram because it makes our twenty-four hours to run into that we inspired yous to DIY! xx- Elsie
P.South. If you lot have any other questions, please ask me hither in the comments!
Credits//Author: Elsie Larson. Project Assistant: Collin DuPree. Photography: Bister Kelly. Photos edited with A Colour Story Desktop.

Source: https://abeautifulmess.com/heres-what-happened-when-i-painted-my-countertop-faux-marble/
Posted by: orrlittleth.blogspot.com
0 Response to "How To Repair Fake White Marble"
Post a Comment